Cinnmon Roll Pancake

Cinnamon Roll Pancakes

Cinnamon Roll Pancakes

Yes, you read that correctly! I know it is hard to believe that all that cinnamon-y goodness could be packed into a pancake and still taste like a cinnamon bun with icing, but low and behold I made them and they were amazing!
These take a little bit more effort than just a regular old homemade pancake, but they are so worth it. I think this is a perfect treat for Christmas morning or any special occasion breakfast.
In the past, we have made our own cinnamon rolls and that requires you make and proof dough, however with the pancake version your family will have all the flavors of the cinnamon rolls without all that time and effort.

Ingredients
  

Pancakes

  • 1 Cup Flour
  • 2 Teaspoons Baking Powder
  • 1/2 Teaspoon Salt
  • 1 Cup Milk
  • 1 Egg
  • 1 Teaspoon Vegetable Oil

Cinnamon Filling

  • 6 Tablespoons of Brown Sugar
  • 1/2 Stick of Butter Melted and Cool to the Touch
  • 1/2 Tablespoon of Ground Cinnamon

Glaze

  • 2 Ounces of Whipped Cream Cheese
  • 1/2 A Stick of Butter
  • 3/4 of a Cup of Powdered Sugar
  • 1 Teaspoon of Vanilla Extract

Instructions
 

Glaze

  • In a small saucepan melt the butter, the vanilla
  • Add the cream cheese until melted
  • Slowly add in the powdered sugar and mix until dissolved
  • Set aside to cool
  • Once cooled, fill a piping bag or plastic baggie with tip cut off with the icing

Cinnamon Filling

  • Stir together all ingredients
  • Place inside a piping bag with a small tip (If you do not have a piping bag once ready to ice you can cut a small corner off a filled plastic baggie)

Pancakes

  • Whisk together the dry ingredients
  • In a separate bowl mix the wet ingredients
  • Mix together lightly - do not overwork the batter, a few lumps are fine
  • Spray a pan or griddle with cooking spray
  • Over medium heat
  • Drop a scoop-full of the batter onto the pan (for rounder pancakes use an ice cream scoop)
  • Once the pancakes start to bubble, grab the bag of glaze and draw a round swirl starting from the inside of the circle outward. Do not draw the swirl too close to the edge of the pancake or the sugar can burn.
  • Check the bottom of the pancake flip when it is the desired color or light brown.
  • Let the cinnamon side cook and check your heat to make sure the sugars are not cooking too quickly. If you need to remove the pan from the heat and lower the temp.
  • Between each batch wipe out the pan to remove excess sugar.
  • Drizzle each pancake with the icing
Tried this recipe?Let us know how it was!

Yes, you read that correctly! I know it is hard to believe that all that cinnamony goodness could be packed into a pancake and still taste like a cinnamon bun with icing, but low and behold I made them and they were amazing!

These take a little bit more effort than just a regular old homemade pancake, but they are so worth it. I think this is a perfect treat for Christmas morning or any special occasion breakfast.

In the past, we have made our own cinnamon rolls and that requires you make and proof dough, however with the pancake version your family will have all the flavors of the cinnamon rolls without all that time and effort.

Ingredients

Pancakes
  • 1 Cup of Flour
  • 2 Teaspoons of Baking Powder
  • 1/2 Teaspoon of Salt
  • 1 Cup of Milk
  • 1 Egg
  • 1 Teaspoon of Vegetable Oil
Cinnamon Filling
  • 6 Tablespoons of Brown Sugar
  • 1/2 Stick of Butter Melted and Cool to the Touch
  • 1/2 Tablespoon of Ground Cinnamon
Glaze
  • 2 Ounces of Whipped Cream Cheese
  • 1/2 A Stick of Butter
  • 3/4 of a Cup of Powdered Sugar
  • 1 Teaspoon of Vanilla Extract

Instructions

Glaze
  1. In a small saucepan melt the butter, the vanilla
  2. Add the cream cheese until melted
  3. Slowly add in the powdered sugar and mix until dissolved
  4. Set aside to cool
  5. Once cooled, fill a piping bag or plastic baggie with tip cut off with the icing
Cinnamon Filling
  1. Stir together all ingredients
  2. Place inside a piping bag with a small tip (If you do not have a piping bag once ready to ice you can cut a small corner off a filled plastic baggie)
Pancakes
  1. Whisk together the dry ingredients
  2. In a separate bowl mix the wet ingredients
  3. Mix together lightly – do not overwork the batter, a few lumps are fine
  4. Spray a pan or griddle with cooking spray
  5. Over medium heat
  6. Drop a scoop-full of the batter onto the pan (for rounder pancakes use an ice cream scoop)
  7. Once the pancakes start to bubble, grab the bag of glaze and draw a round swirl starting from the inside of the circle outward. Do not draw the swirl too close to the edge of the pancake or the sugar can burn.
  8. Check the bottom of the pancake flip when it is the desired color or light brown.
  9. Let the cinnamon side cook and check your heat to make sure the sugars are not cooking too quickly. If you need to remove the pan from the heat and lower the temp.
  10. Between each batch wipe out the pan to remove excess sugar.
  11. Drizzle each pancake with the icing

Enjoy!

Candied Bacon 1023

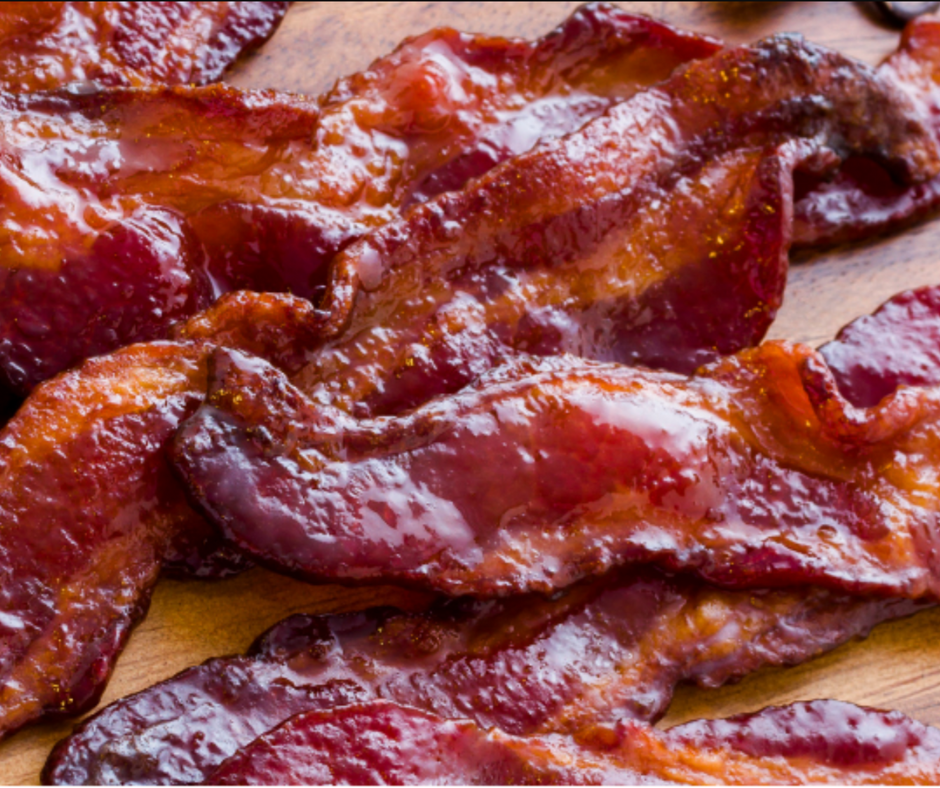
A Story About Pig Candy

Who doesn’t like bacon? It seems that we are a bacon obsessed world sometimes. What makes bacon even better, how about candied bacon? My friends have always joked that I should write a cookbook called “Jan’s bacon on everything”. We all know it’s fatty, we all know it’s salty, and we know it is a processed food, however, we like it anyway. I have a friend who even wraps his Thanksgiving Turkey in bacon before smoking it.

Growing up we always had a coffee tin filled with the white grease with the brown speckles sitting on a shelf in the refrigerator. Mom used that grease in cooking most things in her cast iron fry pan. Which brings me to the smell of cooking bacon. It is one of my favorite smells in the world. There is nothing better than waking up to the smell of someone cooking bacon in the kitchen. What it is about this smoked pork product that makes our tummy growl, our saliva glands activate, and when we crunch into it makes us so happy? Yes, Bacon is the ultimate comfort food.

It is in the spirit of our love for bacon that I decided to kick it up a notch and make some candied bacon also called pig candy in the Southern BBQ world. It comes from the belly and once it is smoked and or cured it becomes bacon. These amazing Barbecue experts will prepare it over smoking wood charcoal which kicks in even more flavor.

How to Cook Candied Bacon

This recipe does not require you to be a pitmaster or even cook it on a smoker. it can be made in your own oven. It is a bit messy as the sugar and fat melt off the strips of bacon. If you are using the oven be sure to line a cookie sheet with parchment paper and maybe even a little aluminum foil. Why both? I have no scientific proof of this but I think the aluminum foil helps to brown the bacon a bit more, and the parchment paper keeps the pan clean. So I line the pan with parchment first and then place a smaller piece of foil on top of the parchment.

To flip or not to flip is the question? I cook my bacon for 15 minutes and then flip it, add a bit more of the sugar mixture, and cook for another 15 minutes. Since we are talking dos and don’ts here I will never, ever, ever do this in a frying pan as the bacon never crisps, it just gets sticky and makes a big mess to clean. Always use good quality thick-sliced bacon, avoid those thin store brands that shrink up to nothing when you cook it. If you can get it from a butcher’s market that would be advisable, however, there are some thick cuts that will work just fine from the grocery stores.

When your pan is lined properly, find the rack that you cool the holiday cookies on and place it on top of the lined pan. This is what will allow the bacon grease and sugar to drop from the slices and will keep the burning sugar off of your bacon. Yes, some of the grease and sugar will turn black on the bottom of your pan. To avoid infusing the smell of burnt sugar into your kitchen and your food, set the over rack on the mid to upper-level position before you pre-heat.

You will know when the bacon is done in approximately 15 minutes after flipping it, as you see it become a nice light brown color. Not a blackish brown, if it is blackish-brown you have burnt the sugar and it will not be good. Do not worry if it is not yet firm as you let it cool it will become more firm sitting on the rack. give the bacon 15 minutes to cool. Do not be tempted to pick it up before it cools as the sugars will stick to your fingertips and cook them like bacon. This will hurt, they will not taste like bacon, just burnt skin. I have learned from experience. Patience is a virtue!

Below is a recipe that I have adapted over time and think this will give you a result your family and friends will rave about. It is the perfect combination of salty, sweet, and a little spice. You can serve this as an appetizer or as an accouterment. Picture this bacon crumbled sitting on top of a wheel of warm brie cheese. I like to make the candied bacon an option for my brunch guests on the Bloody Mary bar. It makes a great accompaniment to a Bourbon cocktail or even adds just a little extra something in a glass of apple cider. Speaking of apple cider and bourbon, I used a quarter of a slice of this candied bacon on top of my Halloween Apple Cider Bourbon Jello Shots. That sure did make the adults trick or treating happy this year.

Whichever way you plan to enjoy candied bacon just know that your family and friends may be spoiled forever, you may never be able to serve them just plain old bacon again.

A Recipe For Pig Candy

Ingredients

  • 1 Pound of Thick-Sliced Bacon (I prefer applewood smoked)
  • 1 Cup of Brown Sugar
  • 2 and 1/2 Teaspoons of Cayenne Pepper
  • 1 Tablespoon of Course Black Pepper (more for sprinkling optional)
  • 1 and 1/2 Teaspoons of Cinnamon
  • Parchment Paper
  • Aluminum Foil
  • Cookie Sheet
  • Cooling Rack

Instructions

  1. Preheat the oven to 350 degrees F
  2. Set the oven racks to the middle of the oven as cooking too low or too high will not yield the desired result.
  3. Prepare the cookie sheet by placing the parchment in the bottom, with a small layer of aluminum foil over the parchment, then place the cooling rack directly on top of it. If you are making the full pound you will need a second pan also set up and or plan your time to make these in batches.
  4. Decide if you are serving whole strips or if you are serving a half or quarter strip. (For a tall drink you will need a full strip, but for a bite as an appetizer, a full strip may be a bit much.) Cut the raw bacon to the size needed.
  5. In a large bowl combine the brown sugar, cayenne pepper, cinnamon, and black pepper
  6. Add a few slices at a time and coat well with the sugar mixture
  7. Lay the coated slices out on the cooling rack, do not crowd them, give them room to brown and crisp up properly.
  8. Place in the oven and check after 10 minutes to see if they are ready to flip, if not give them 3-5 more minutes. Remove the pan from the oven do not try to flip in the oven or you will have a mess.
  9. If you see any bare spots you could carefully spoon a tiny bit of the mixture on top of the flipped bacon or you could sprinkle some of the ground black pepper for a spicier taste and a more textured effect.
  10. Place them back in the oven for 15- 20 minutes more, until browned. Do not let them overcook. They will harden when cooling. Below are some pictures of the placement of my bacon on the various rack and differing amounts of time. The bottom rack burnt the sugars on the bacon at 30 minutes, however the top rack at the same time with the lower quality bacon cooked just fine. In the second test with better quality bacon, the top rack seemed slightly under cooked. That is why the middle rack is perfect.
  11. Remove from the rack after 5 minutes and let cool on a plate for approximately 10 minutes before handling

Enjoy!


Large -father-s-day-greetings-2312124 (1)

Father’s Day Meal Ideas

For Father’s Day, skip the gift of a tie. These days no one is dressing up or even heading into the office. Instead, why not show your dad you love him with a meal fit for a king? You can treat him to a special Father’s Day-inspired meal that you prepare and serve yourself in the comfort of your own home, or his. We have put together a few ideas that will certainly receive his stamp of approval.

Starting with Beef

Most men love a good steak but are only allowed to eat it on special occasions, so why not go over the top with a Smoked or Grilled Tomahawk Steak. This cut of meat is quite controversial in many BBQ groups since its impressive bone is weighed and included as part of the total purchase price. Some barbecue aficionados will argue that it is a waste of money, however, others love it for the taste and the show. It is quite impressive spilling over a normal-sized dinner plate. You can always use the bone for soup, that’s what we do.

You know your father better than anyone else, so based on his personality, decide if he would like digging into his steak like a caveman or if he would still prefer a little indulgence just served with a dose of frugality.  Either way, we have you covered with a special Father’s Day steak. 

If your dad would disapprove of all that bone. You can always opt to go with the Tomahawk’s little brother, The Cowboy Ribeye.  We did ours as a smoked version and then reverse seared it on the grill. But if you do not have a smoker this works fine with a regular grill too. Make sure you alway use a meat thermometer to ensure it is cooked to his preference. 

Where do you find these cuts of beef?  Sometimes Harris Teeter or Publix carries them, or you can visit your local butcher shop. Don’t wait until the last minute or you may not find these popular Father’s Day cuts of beef. 

I have included the herb butter recipe for you as well.

What about those men who do not eat beef?

We suggest the St.Louis Style Pork Ribs. We smoke our own ribs, but grilling them or oven cooking them low and slow also works. Use a dry rub that has smokey qualities to it. You can mix your own rub using chipotle, brown sugar, and salt or purchase a premixed one from the spice store. We love Savory Spice in Raleigh VomFASS in Cary or Grill Billies BBQ in WakeForest or Wendell. Pair these ribs with a summer vegetable and a cool drink and your dad will be thrilled. 

But what about the dads who don’t eat meat?

Why not pamper him with the fish that eats like a steak. You can grill, pan fry or bake swordfish. With this recipe you cannot go wrong.

Some dads are vegetarian and if this is the case, boy do we have a winner of a dish for you. This flavor-packed Grilled Eggplant Caprese dish is our very favorite way to eat vegetarian. Your dad will feel special knowing you made this just for him. 

Don’t forget dessert!

To finish off a wonderful meal, something sweet is always welcome. We have got a few ideas that will help you end a perfect Father’s Day. Here are some simple ideas.

Ensure your Father’s Day meal is a success, make him a happy man. After all that he has done for you in his life, what a better way to show you you love him than by cooking for him. Food is love!

Reverse Seared Tomahawk Steaks

Tomahawk Steaks are basically a fancy ribeye. The bone that the steak is normally cut from, is left attached and frenched out.  They are usually sold in a thick cut as you see here.

We got these for a Father’s Day celebration.  My husband was quite pleased with the result. First, we smoked them, and then we did a reverse sear on our second grill. I made an herbed butter that we brushed over the top when they were being seared. 

  • 2 Tomahawk Steaks (special cut at the butcher)
  • Salt 
  1. Salt the steaks well
  2. Smoke with hickory wood for 25-30 minutes at 350 degrees F or until the internal temperature reaches 130 degrees F (for medium rare). This is all based on thickness and how cold the meat was when you put it on the smoker. You may have to modify a bit, but don’t overcook these lovely prehistoric looking steaks. 
  3. Drop on to a preheated, clean grill on medium-high heat and sear both sides by brushing on the herb butter as you sear each side. Watch for flare-ups, some are okay. 

Serve with your favorite salad and potato it’s a meal fit for a king! 

Cowboy Ribeye Steaks on the Smoker

Yippee Ki yay we are having some good-old, melt-in-your-mouth Texas cowboy rib-eye steaks on the smoker today. This is a huge piece of meat and needs to be salted and smoked on indirect heat. We used hickory and it was wonderful. Once it was done we brushed some garlic-herb butter on top and yes, it was as good as it looked! 

  • 1 Tablespoons of Salt 
  • The Cowboy Rib-eye Steak (one steak was more than enough for two) 
  • 3- 4 Tablespoons of Butter 
  • 1 -2 Cloves of Garlic 
  • 2 Sprigs of Fresh Rosemary and or Parsley
  1. Salt the steak and let it sit out for an hour before smoking.
  2. Set your smoker to an indirect heat but only cover half or your grill with the heat reflector. (If you do not have this option be prepared to grill it on another grill). 
  3. Smoke until temp reaches 130 degrees
  4. Melt the butter garlic and herbs and brush the steak and grill it on either side at a high heat to produce a slight char on the outside. 
  5. Enjoy! 
Fixed Pics in LOF 1023 (2)

Herb Smoked and Roasted Whole Turkey

The star of the Thanksgiving meal is the turkey. I used a 14.5 lb. frozen turkey. I removed it from the freezer to the refrigerator on Saturday to be ready on Thursday.  It is important to brine the bird for moisture, so we will start with those ingredients. I made my brine more of a marinade than a traditional brine. (A traditional brine calls for more salt and you have to rinse it down before cooking).  I planned to smoke my turkey using a steam pot in my smoker to hold in even more moisture and infuse additional flavor. I will share that also below. Lastly, I rubbed the turkey. This was by far the best turkey I have ever made! 

Brine

  • 2 Gallons of Water
  • 18 Ounces of Vegetable Stock
  • 1/3 Cup of Sea Salt
  • 2 Bay leaves
  • 1 Apple (sliced)
  • 1 Onion (rough cut)
  • 1 Sprig of Fresh Rosemary 
  • 1 Sprig of Fresh Thyme
  • 1 Sprig of Sage

 Steam Pot
(I used my blue dutch oven to put in the smoker under the bird) I used mostly all the same ingredients as above. 

  • 2 Bay leaves
  • 1 Apple (sliced)
  • 1 Onion (rough cut)
  • 1 Sprig of Fresh Rosemary 
  • 1 Sprig of Fresh Thyme
  • 1 Sprig of Sage
  • 18 Ounces of Vegetable Stock
  • 1-2 Carrots (cut into quarters)
  • 1-2 Celery Stalks (cut into quarters)

For the Turkey Rub 

3/4 of a Stick of Butter

1/4 Cup of Fresh Thyme (removed from stem)

1/2 Cup of Minced Rosemary (no stems)

1/2 Cup to 3/4 Cup of Minced Sage (no stems)


For the Brine

  1. Add all brine/marinade ingredients to a large pot or oversized bowl. 
    (remember I made a quasi brine that was more like a marinade so no need to boil and cool or to rinse the next day).
  2. Soak overnight. 
  3. Pull the turkey from the brine after 12 hours and pat completely dry with paper towels. (This is an important step for the skin to cook properly in the smoker).

For the Rub

  1. Mix all the ingredients with a food processor or immersion blender
  2. Apply the rub with your hands all over the dry turkey before smoking it.
  3. Reserve some for basting in a small pot on the stove. 

For the Steam Pot

  1. Add in all the ingredients and once your smoker has been lit and the smoke is the right color, set the steam pot down into the grill, right on the reflector plates and then place your grill racks over it. 

For the Grill

  1. I made a little foil packet of the fresh herbs, sealed it well and poked 3 tiny holes in it and set it down right on the coals (optional) 
  2. I placed a small piece of applewood in the smoker for a mild smoke flavor. 

For the Turkey

  1. Place the turkey on the racks in the grill for 2 hours at 350 degrees F.  
  2. At 1 hour and 40 minutes, preheat your indoor oven to 350 degrees F.
  3. Remove the turkey and place it in a roasting pan. Baste it with the extra mixture of butter and herbs.
  4. Transfer it to your oven. Baste one more time over the next hour.
  5. Tent it with a piece of aluminum foil if the skin appears to be getting too dark before the temperature reaches 160 degrees F. 
  6. When the temp is 160 degrees F pull the turkey from the oven and wrap it in aluminum foil completely and let it sit for 45 mins to an hour before carving.